Do you take awesome photos?
Do you post them online?
If so, you gotta add your sweet watermark!
A watermark keeps people from stealing your artwork.
With a custom one from Photoshop, people will tell your pictures came from you.
And in this tutorial, I will explain to you how to create a custom watermark in Photoshop, so you can protect your work.
What’s a Watermark For?
You made an epic photo. Ya gotta show it’s yours! A watermark does that. It also stops random people from sharing your picture like they snapped it.
When your watermark’s on a photo, they can’t act like they took it.
How to Add Custom Watermark in Photoshop
In Photoshop, you can create any watermark you want!
Add your name, business name, even a cartoon hamster – whatever!
The steps are easy. I’ll walk you through them. Once you have it, you can apply the watermark to each of your pictures.
STEP 1: Launch Photoshop and start a new project.
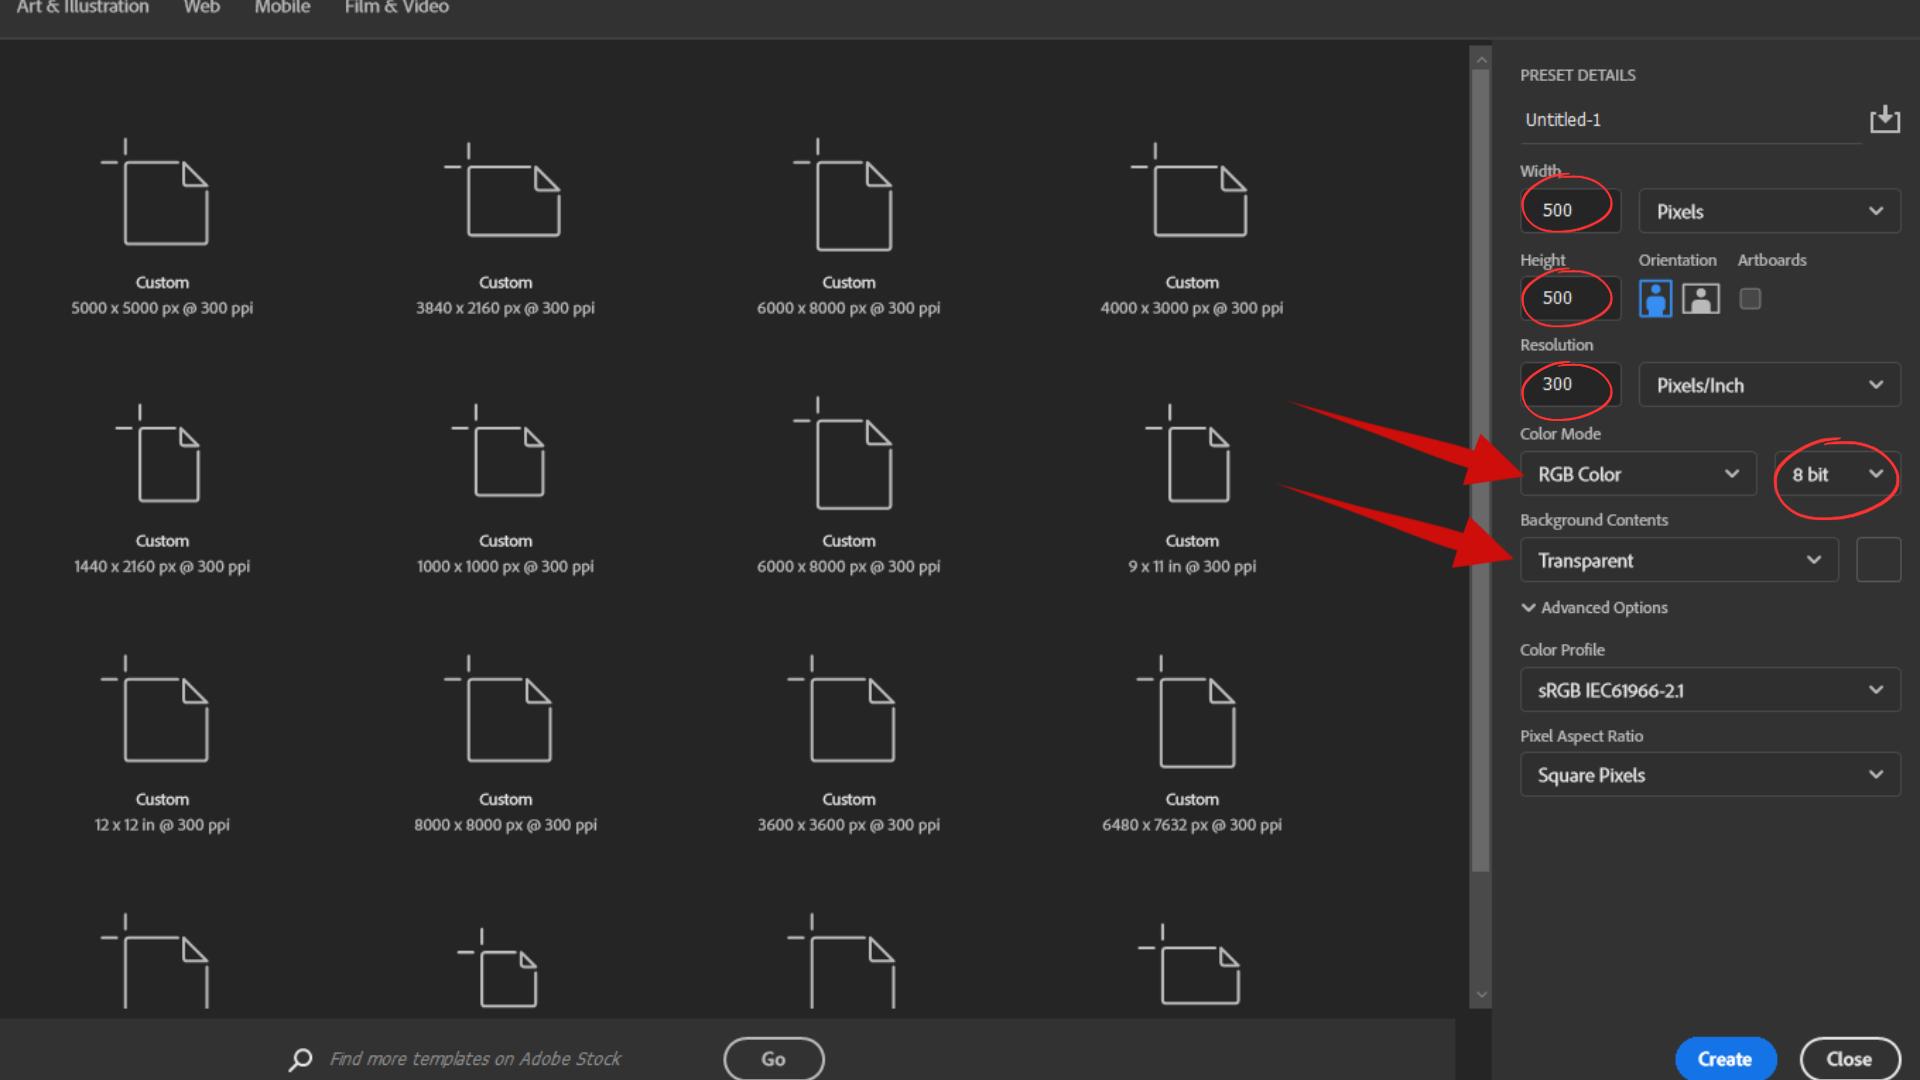
STEP 2: A box pops up. For width and height, put 500 pixels. Set the resolution to 300 pixels per inch. Choose RGB Color and 8-bit. Last, make the background transparent. Hit Create.
STEP 3: A blank page opens. Time to design! Click the text tool in the toolbar – it looks like a T. Click the page and type what you want. I’ll use “NechEmpire.” You can change fonts or size after.

STEP 4: To move text, click the move tool (next to the text tool). Click the words and drag them.
STEP 5: If you want to add a logo to your watermark, just drag the file right onto the page. Resize or move it how you like with the move tool.
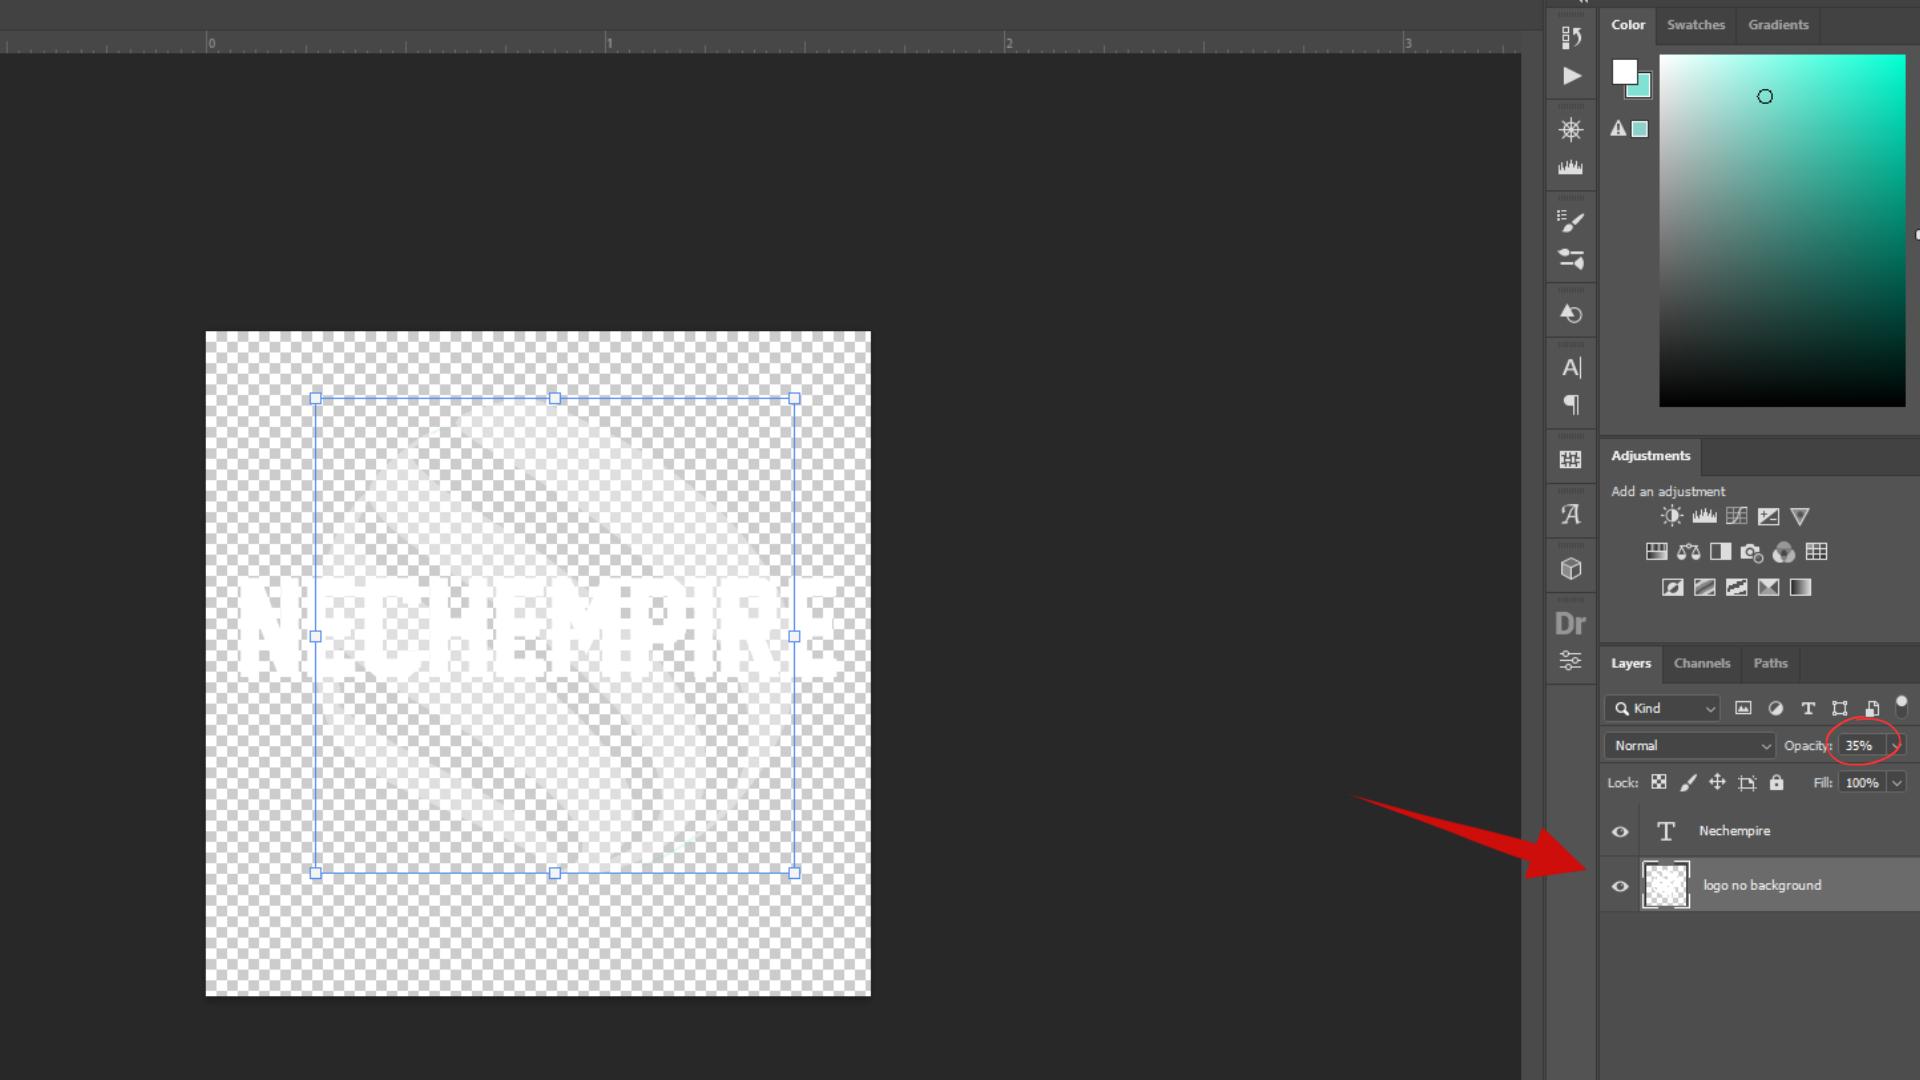
STEP 6: I put the logo on the page and its layer under the text layer. Then I lowered its opacity to 35% so the text shows through better.
STEP 7: Now, we need to convert the design into a tileable pattern. That means it’ll repeat evenly when slapped on a photo.
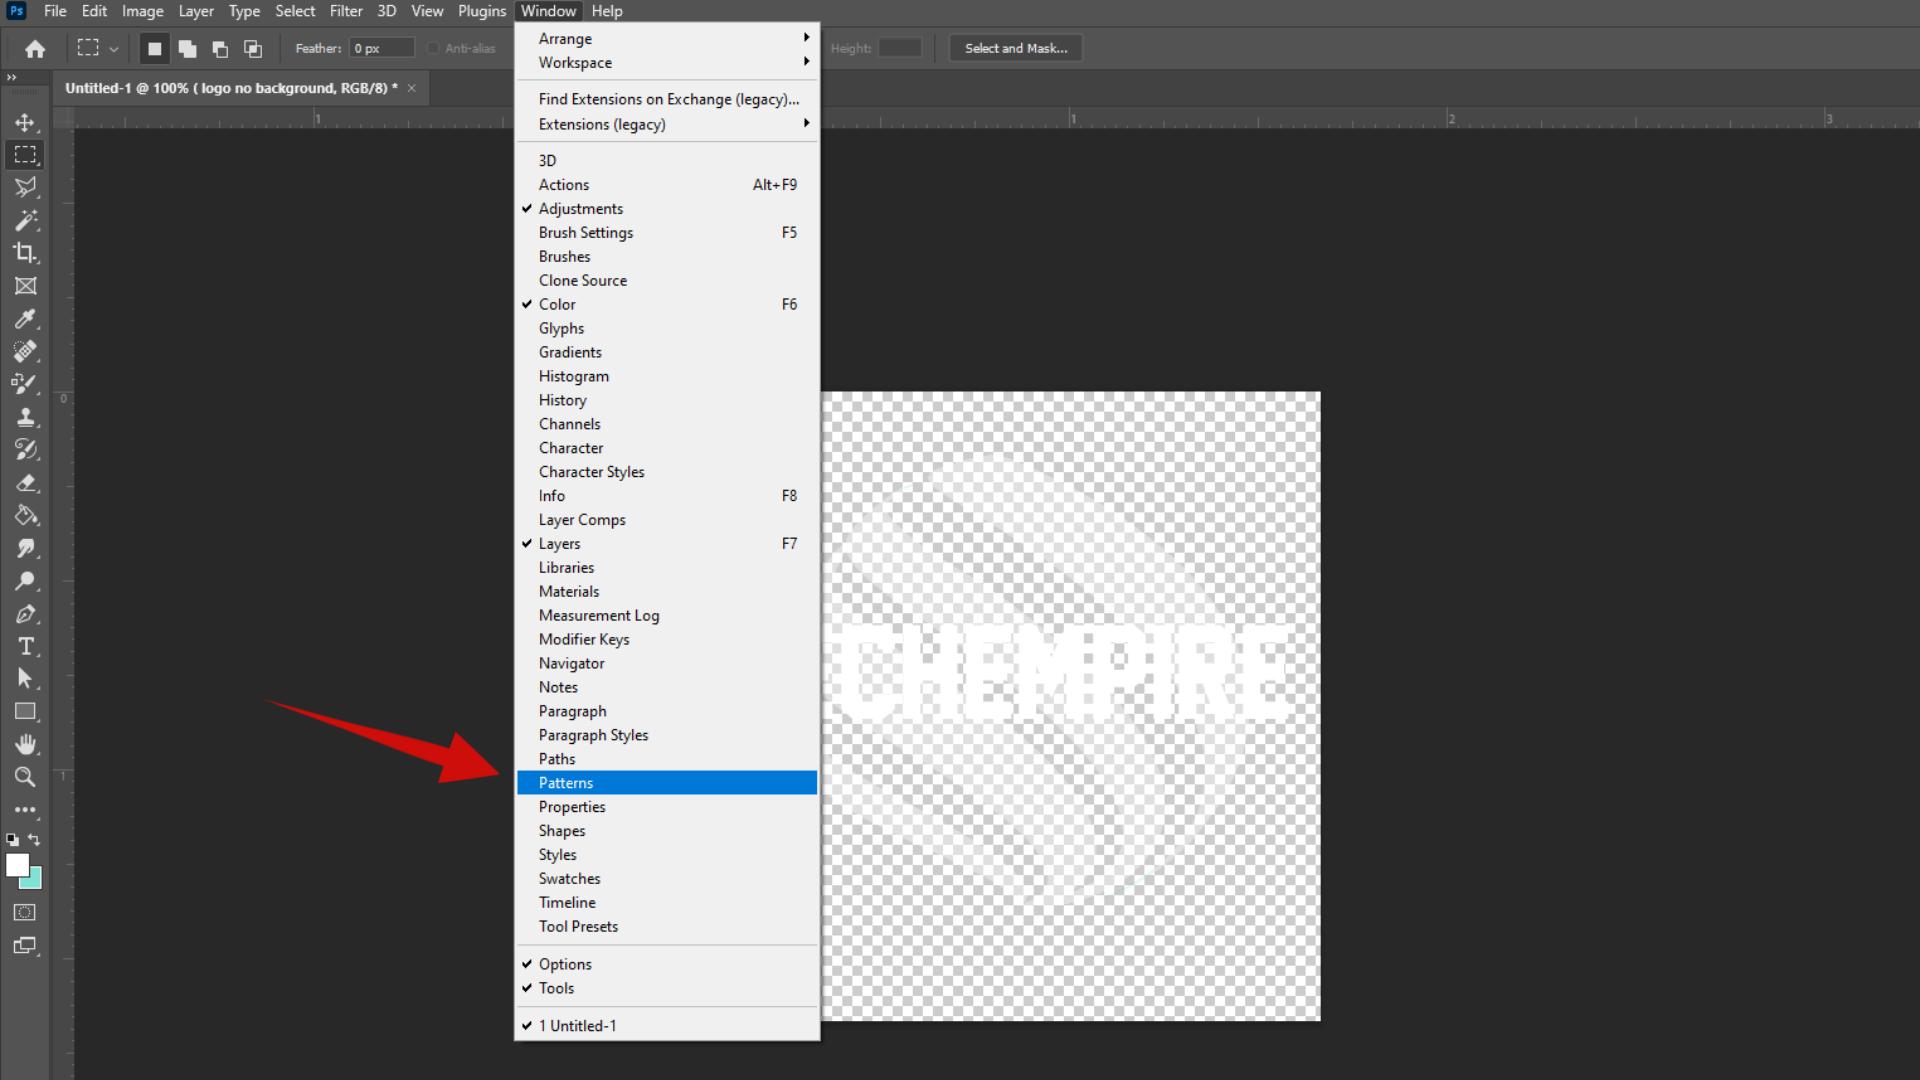
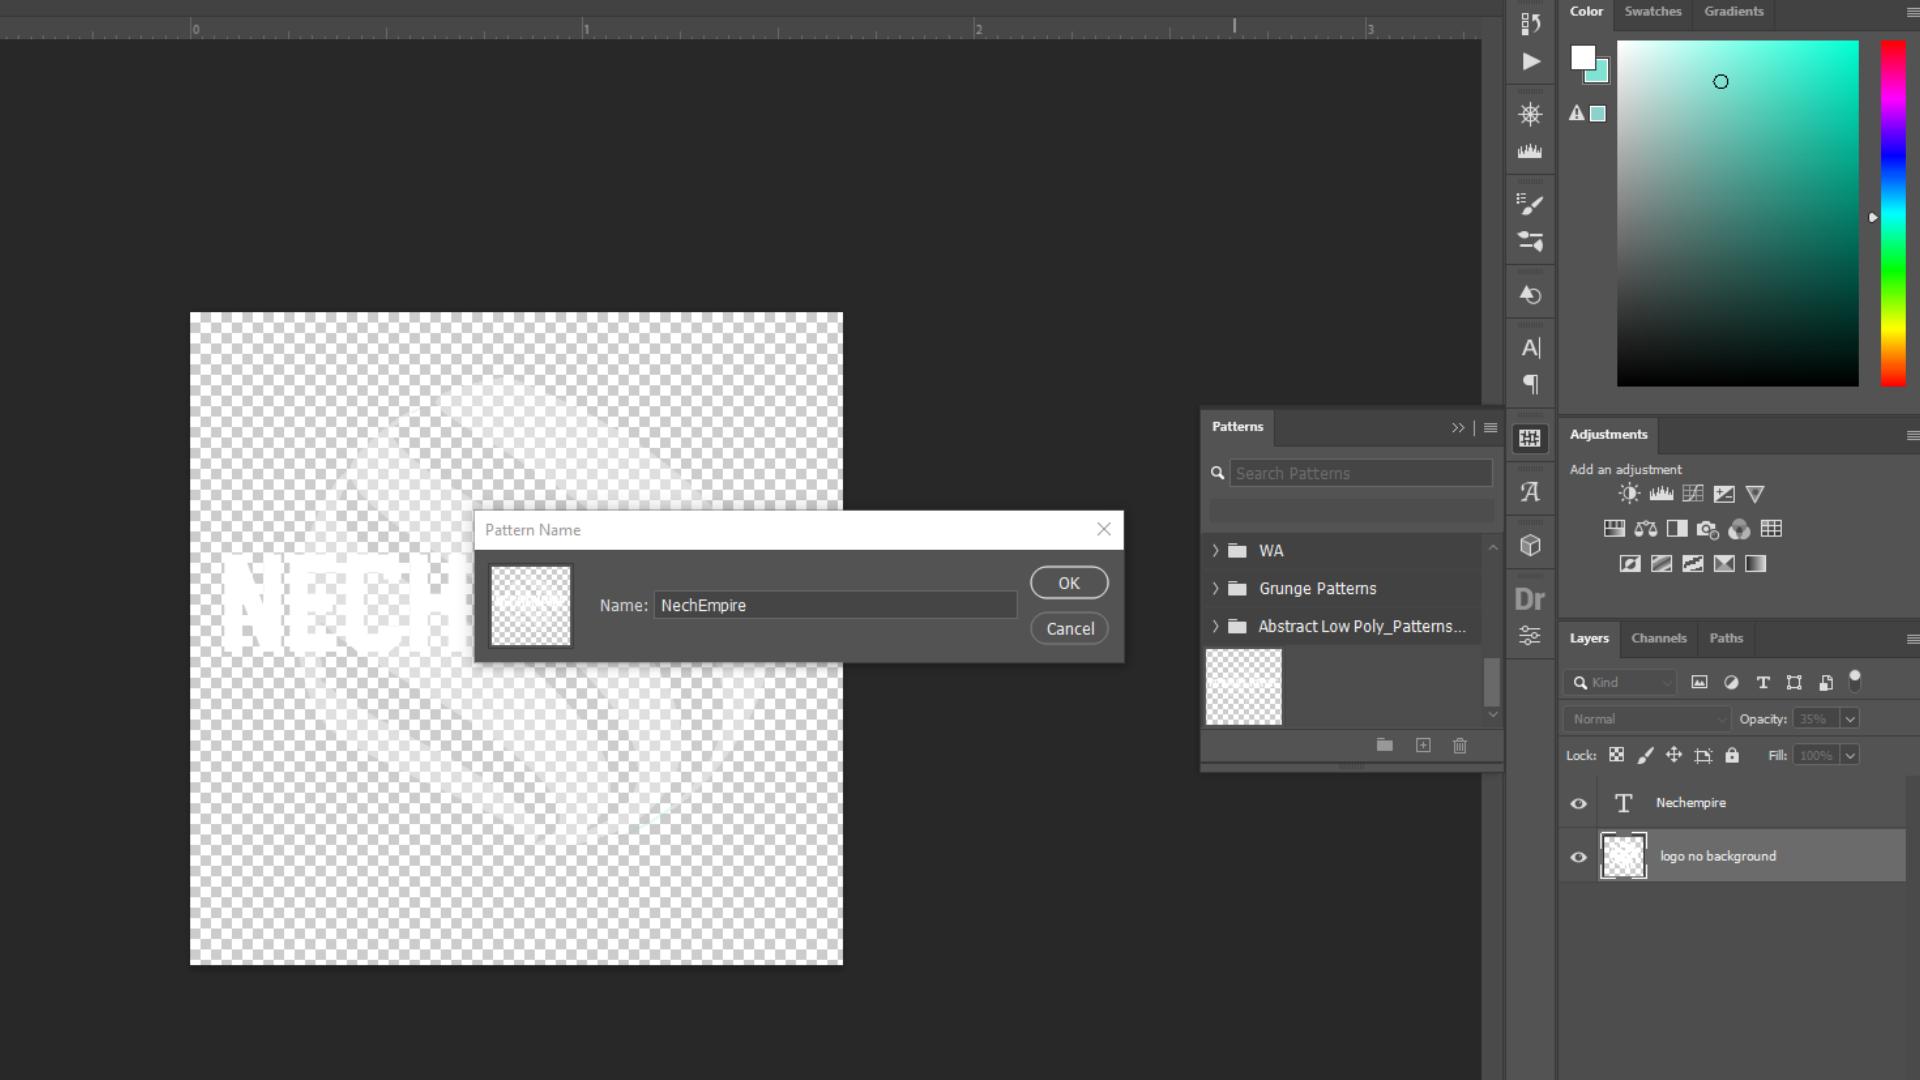
STEP 8: Under the Window in the upper menu, choose Patterns in the sub-menu. A box opens up. Click the folder icon to save your design as a new pattern. Name it whatever, then hit “OK.”
STEP 9: Now we can use it! Open a photo, then click the Adjustment layer icon at the bottom of the layers panel. Select Pattern from the list.
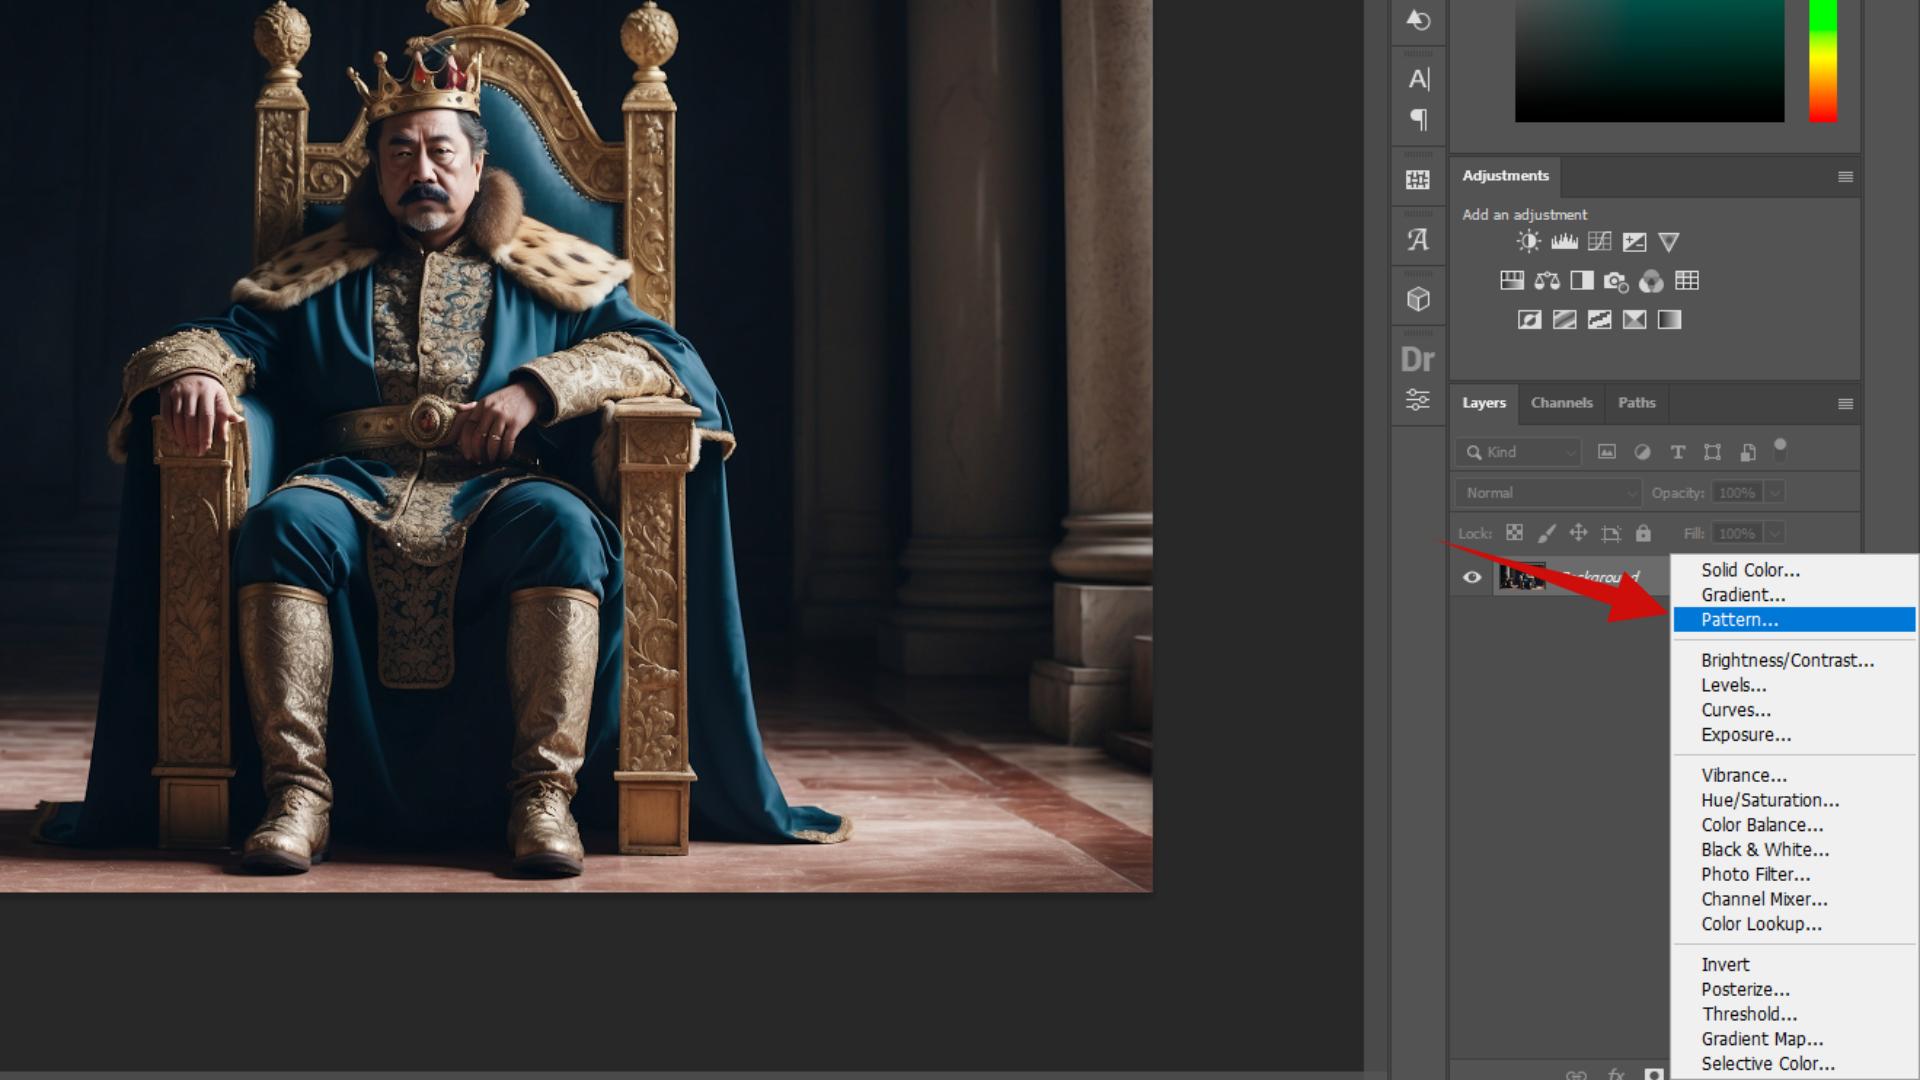
STEP 10: In the box that pops up, pick your watermark from the drop-down menu.
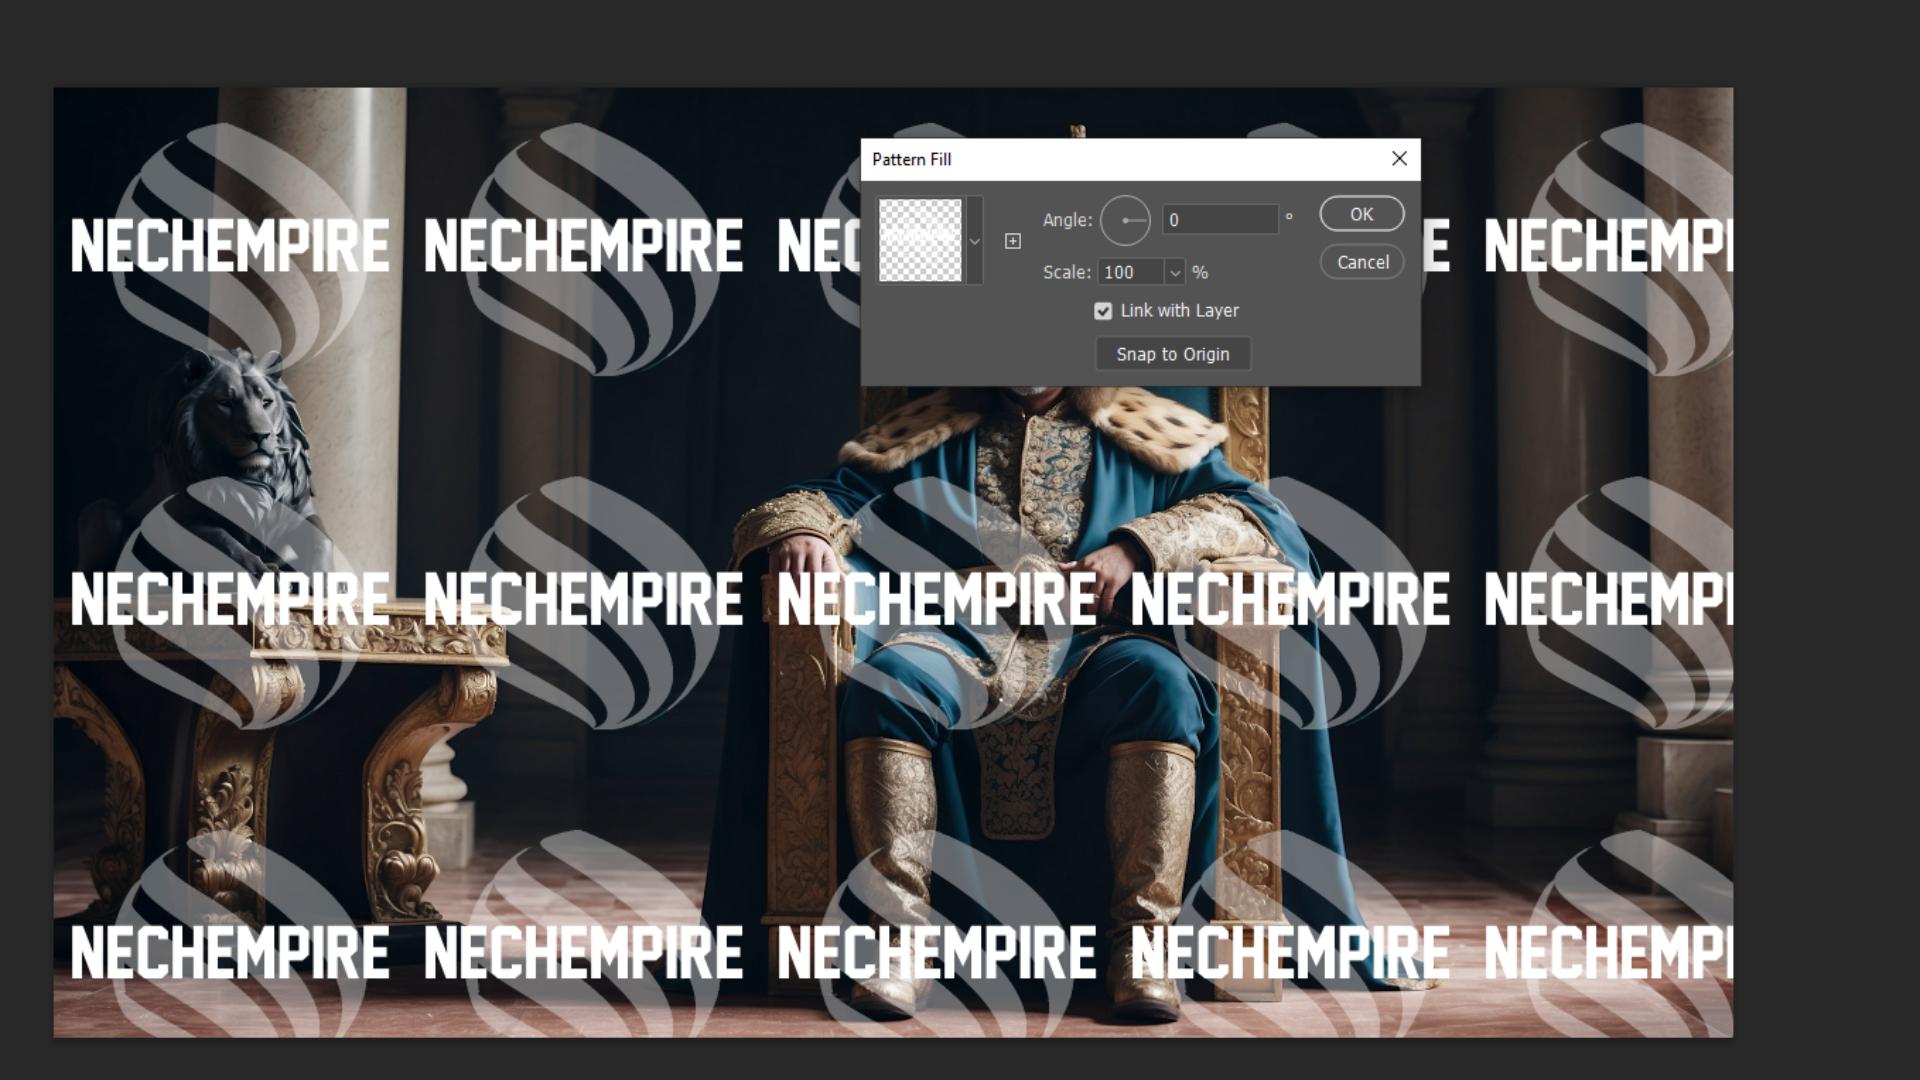
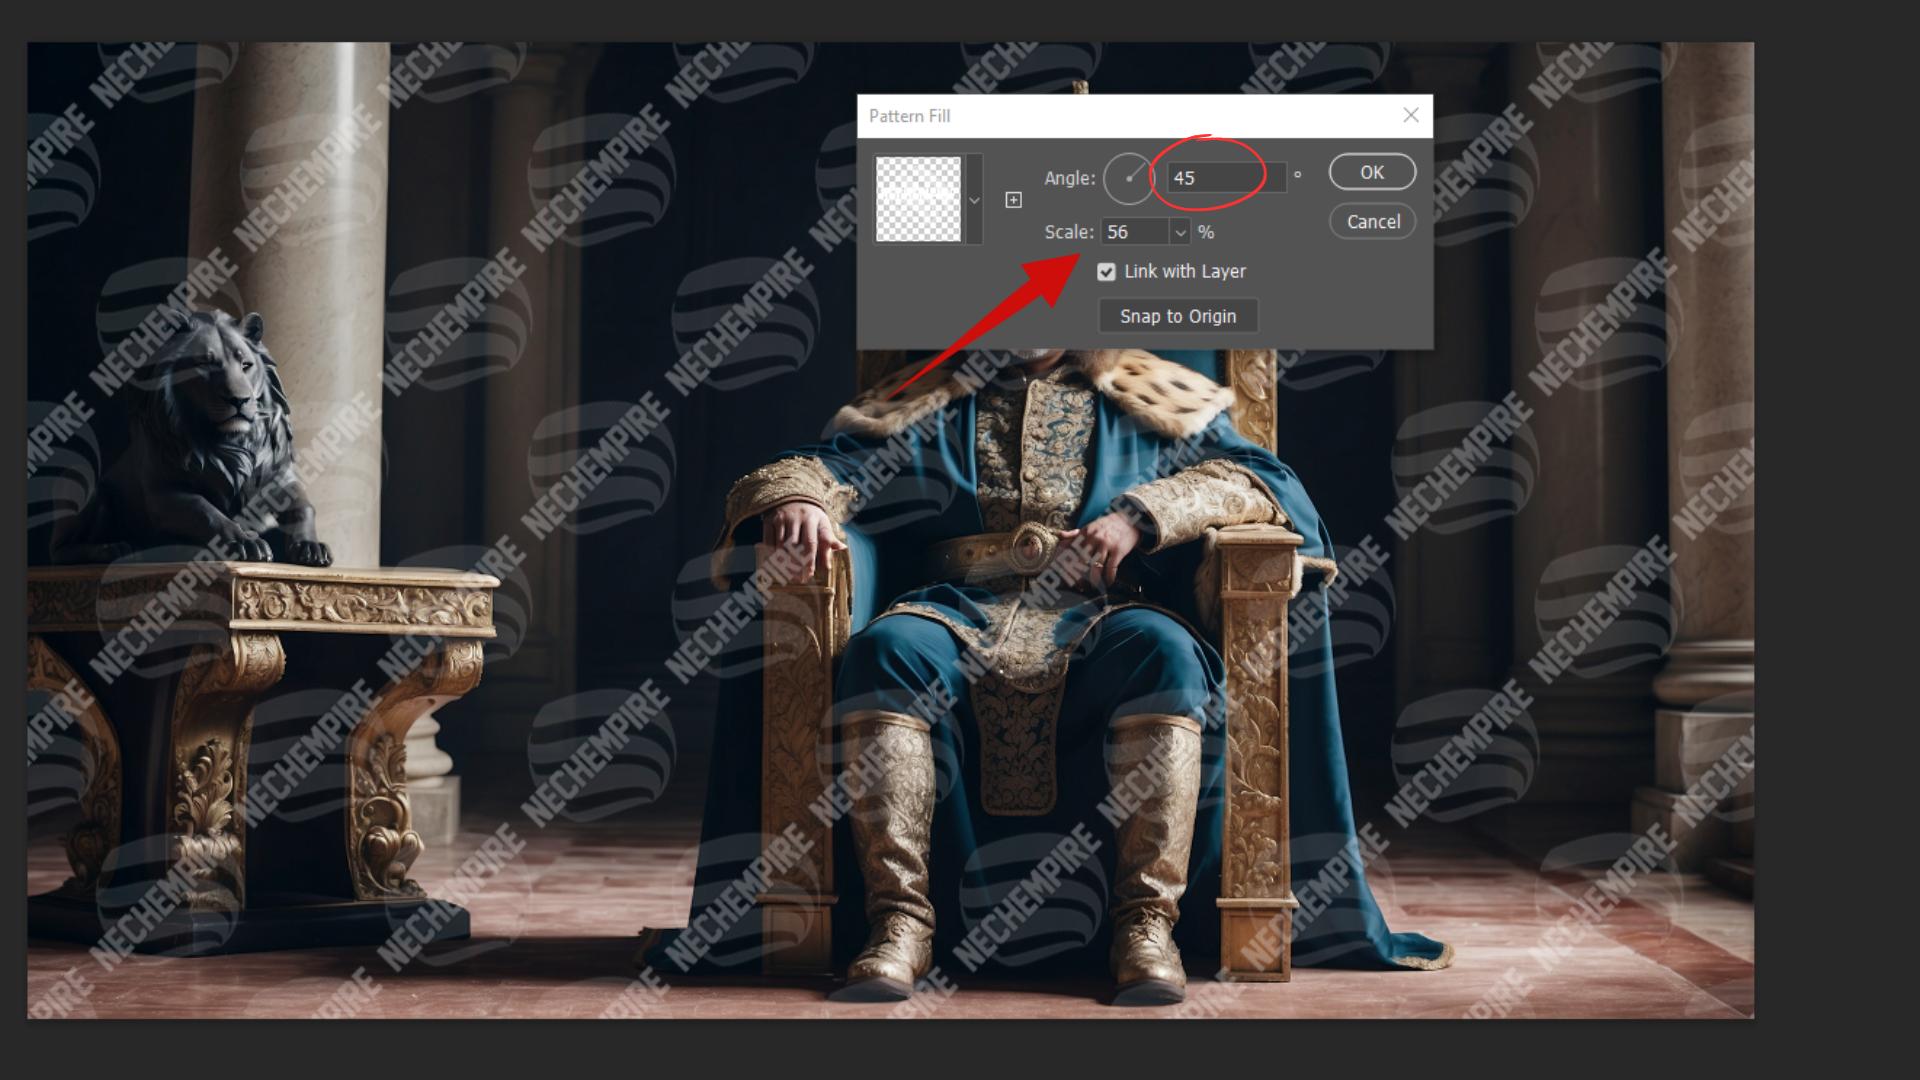
STEP 11: Adjust the angle, and size of the watermark.
STEP 12: Go to the layer panel, and lower the opacity so you can see the picture under it.
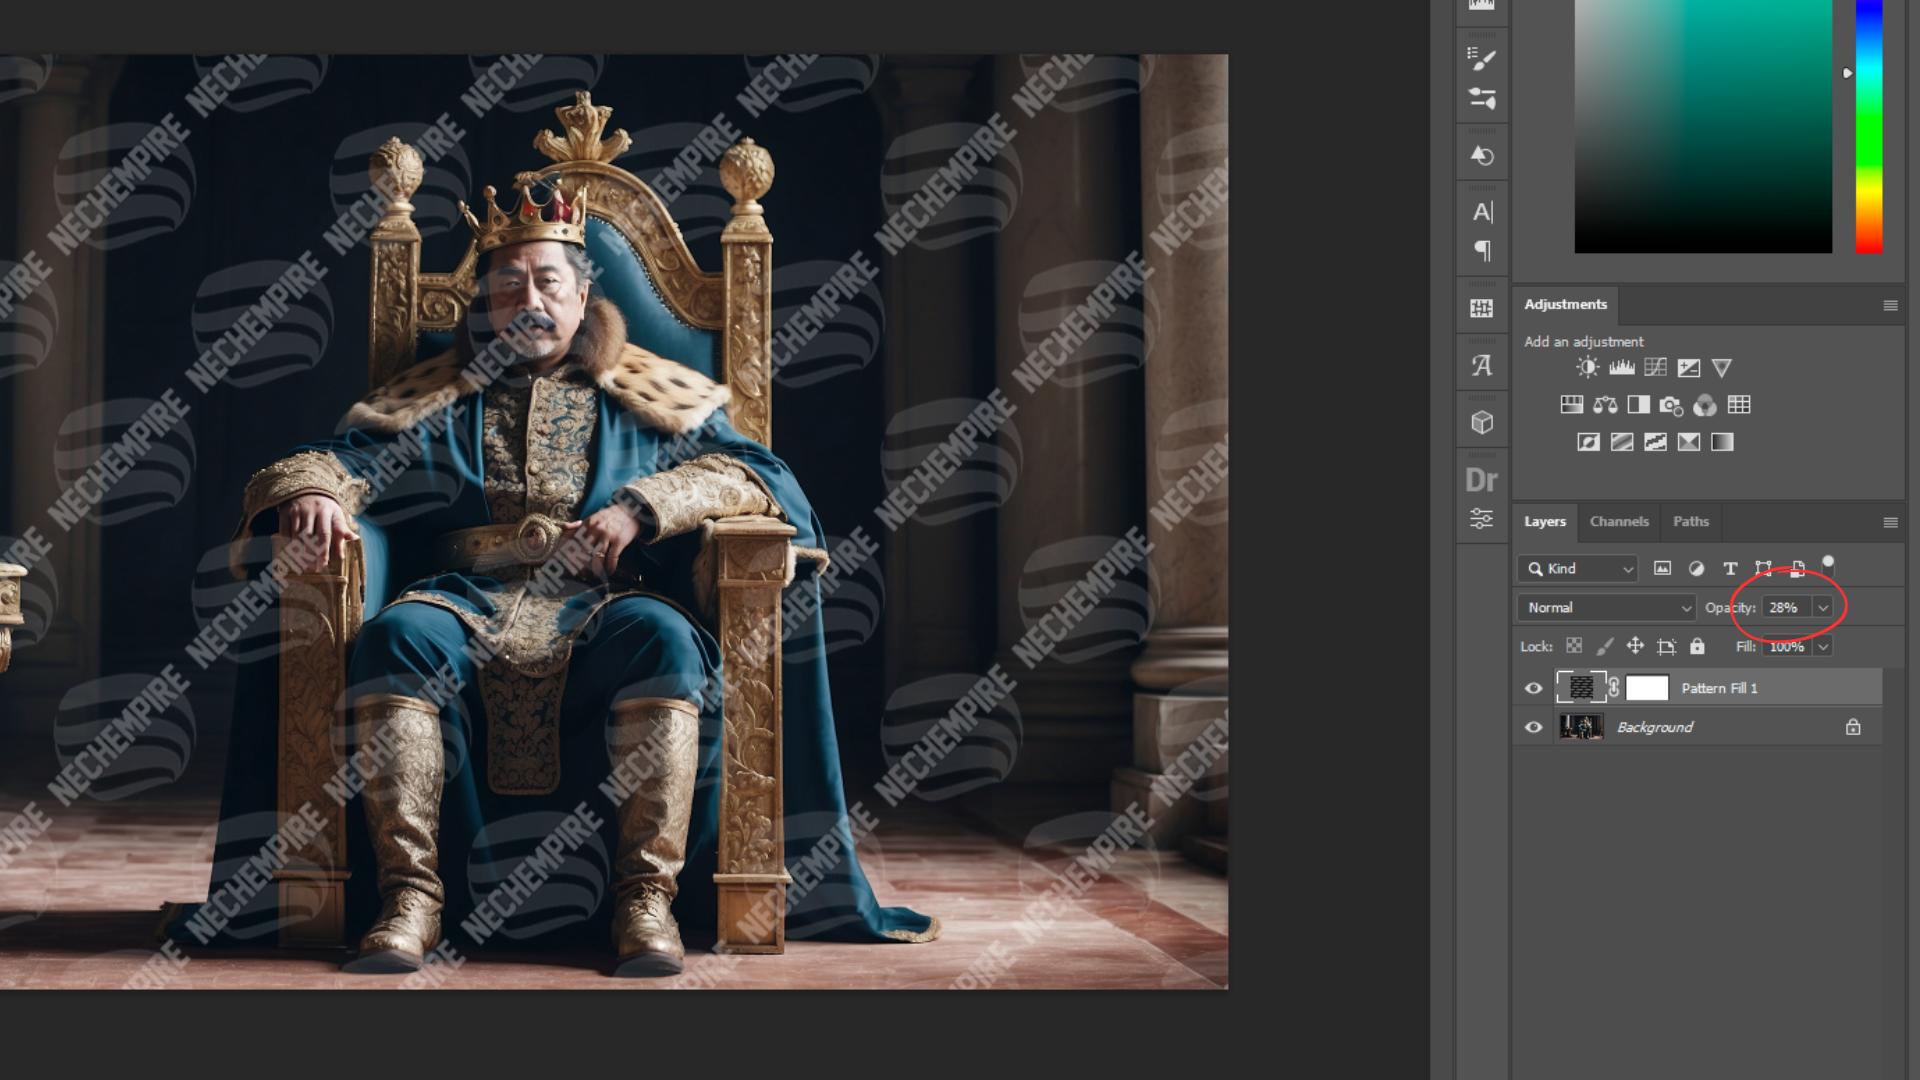
So, as you can see, creating a custom Photoshop watermark is simple!
Plus, it looks slick on your photos and stops punks from jacking them.
Give it a try and get your name on those pics!
BONUS FOR YOU: Get the Digital Product Starter Kit and start building your own online business today.
Here Are Some of My Favorite Tools For Print-on-demand
As a graphic designer and POD seller, I’ve had the opportunity to discover different helpful products and tools that can be time-saving and make the process of creating your designs a bit smoother.
DESIGNS: Kittl (best for t-shirt designs), Vexels (for professional designs), Placeit (for unique product mockups)
GRAPHICS: Creative Fabrica (cheapest marketplace), Envato Elements (more variety)
SELLING DESIGNS: Creative Fabrica (for advanced graphic designers)
ETSY:
- Research – Alura (best), EverBee ( beginners), Sale Samurai (cheap)
- Fulfillment – Printul (beginners), or Printify (advanced).
Disclosure: Some of the links above may contain affiliate partnerships, meaning, at no additional cost to you, NechEmpire may earn a commission if you click through to make a purchase.
- What Happens If a Customer Reports Your Etsy Shop? - July 14, 2025
- Does Changing Listing Photos Affect Your Etsy Listing in Search? - July 11, 2025
- How Long Did It Take Me to Get a Steady Income from Etsy? - July 9, 2025


