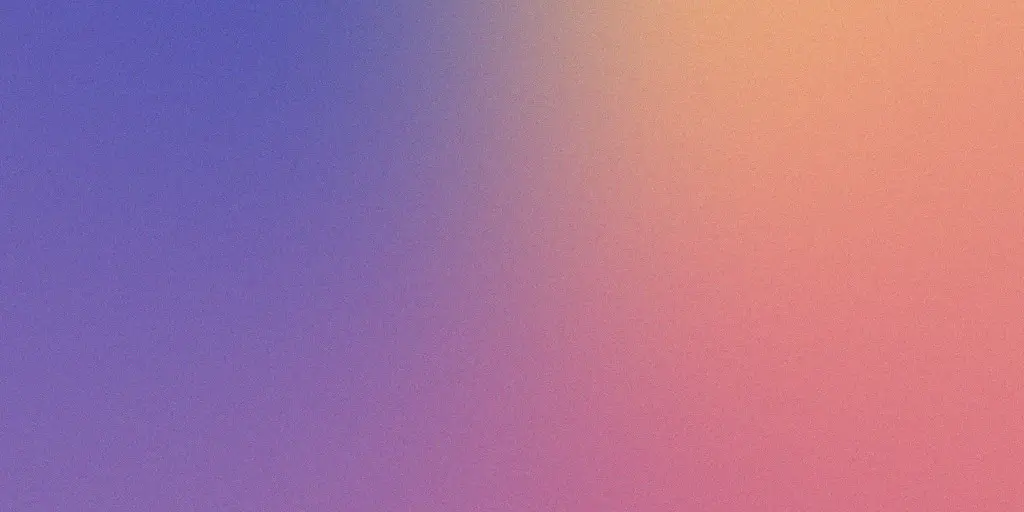
Adding a grainy gradient background is a simple yet effective way to improve your design projects.
By incorporating this technique, you can add depth and texture to your designs, making them visually appealing and unique.
And in this article, I will show you a simple technique on how to create a grainy gradient background in Photoshop, so you can add it to your projects.
A grainy gradient background consists of a blend of colors that gradually transition from one shade to another, combined with subtle grain or noise effects.
This combination creates a visually interesting backdrop that can make your designs stand out from the crowd. It is ideal to use whether you are designing websites, posters, social media graphics, or any other form of visual content.
I would recommend you use a grainy or noisy gradient background to improve the overall aesthetic of your design and captivate your audience’s attention.
Create a Grainy Gradient Background in Photoshop
Here is a step-by-step tutorial on creating a grainy gradient background using Photoshop in just a few simple steps.
Note: If you prefer to watch a video tutorial instead, I have created a video for you. You can watch it below.
Set Up Your Project
STEP 1: Open Photoshop and open a new file by pressing Ctrl + N or go to File and New.
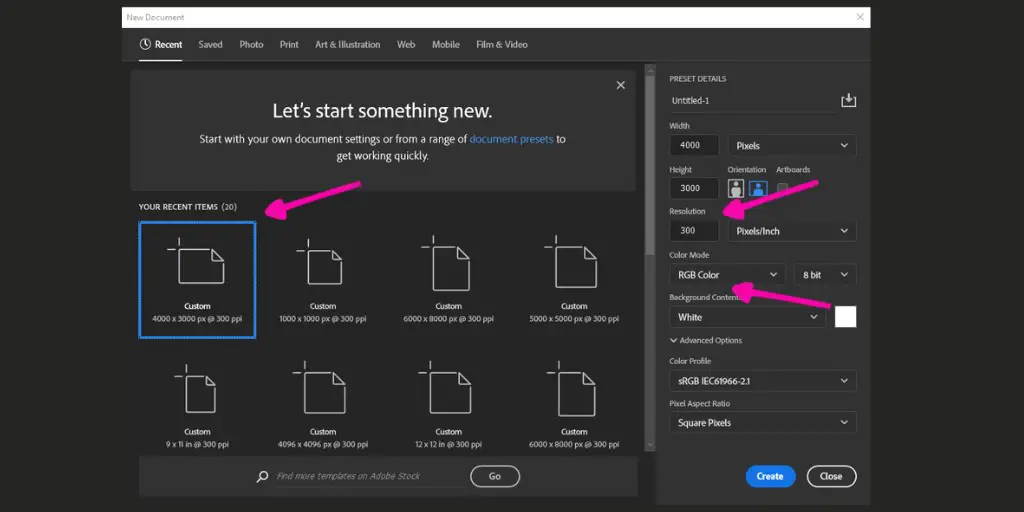
STEP 2: Set the canvas size to any dimension. For example to 4000×3000.
STEP 3: Then set the resolution to 300 DPI and choose RGB for the color mode.
Create the Gradient
STEP 1: When you open the new project, it is time to unlock the background layer.
STEP 2: Now, double-click on the layer to open the Layer Style window.
STEP 3: In the Layer Style window, go to Gradient Overlay.
STEP 4: Set the style to Angle and the angle degree to 90.
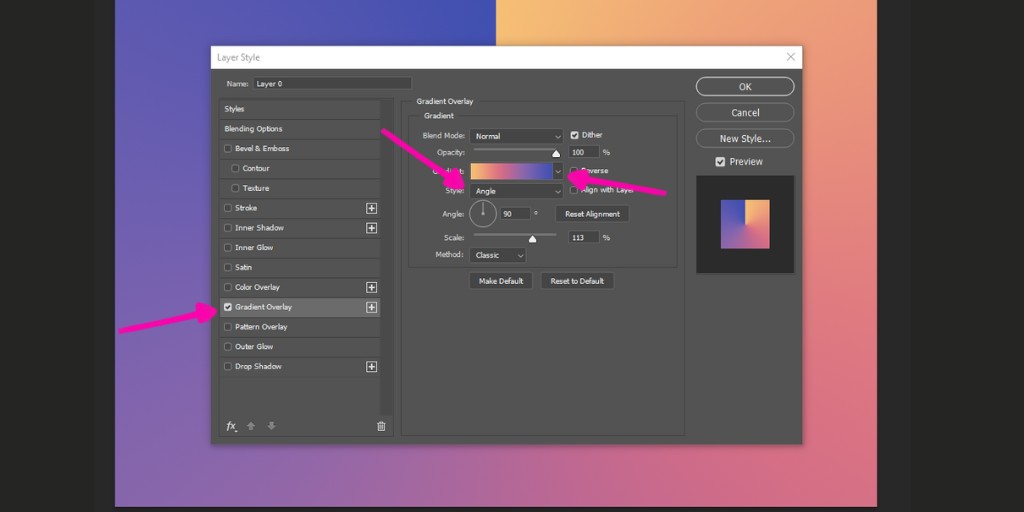
STEP 5: Choose a gradient with contrasting colors. This will help in blurring the image later on.
STEP 6: Once satisfied with your gradient, click OK.
STEP 7: Right-click on the layer and choose Rasterize Layer Style.
Blur the Gradient and Add the Noise
STEP 1: Now it is time to blur the gradient. Go to Filter, find Blur, and select Gaussian Blur.
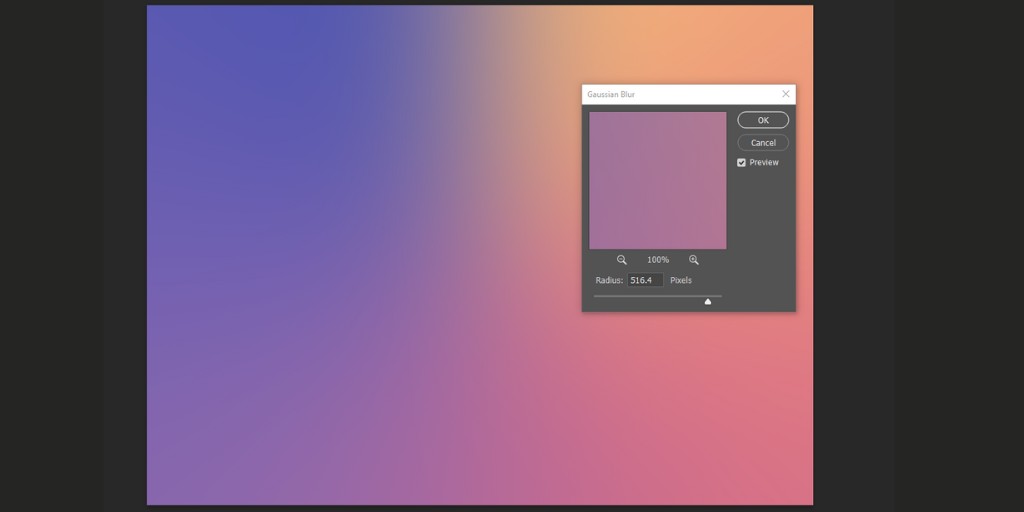
STEP 2: Adjust the radius until the gradient looks natural and the lines between colors are not too distinct. I like to use a value above 500.
STEP 3: To add a noisy effect, go to Filter, find Noise, and select Add Noise option.
STEP 4: Here, choose a low amount of noise, between 5 – 30, and ensure that the noise type is set to Uniform.
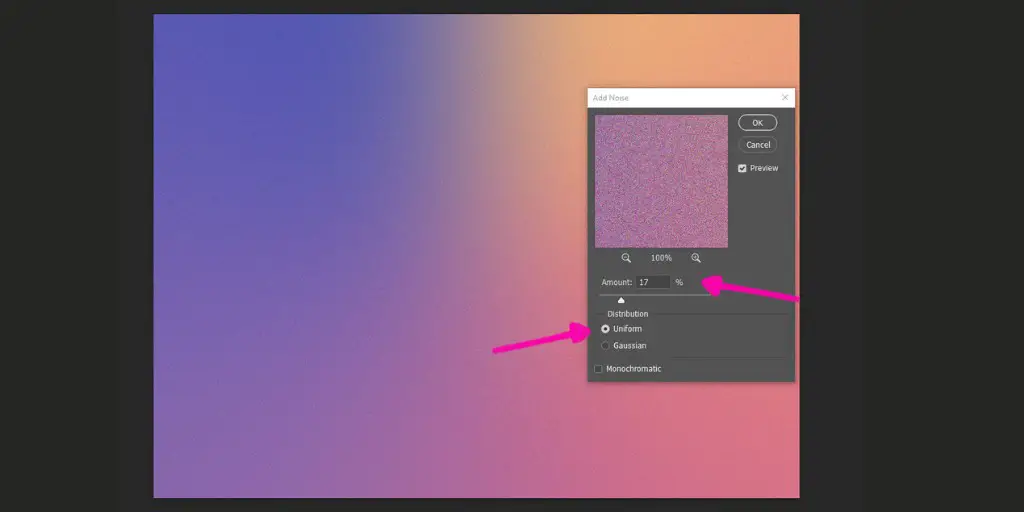
This is a simple method to create a grainy gradient background. As you can see, it is quite easy to do. However, if you want to make it more unique, you can follow the additional steps I will mention below.
Darken the Gradient
STEP 1: Duplicate the layer by pressing Ctrl + J or right-clicking and selecting Duplicate.
STEP 2: Set the blend mode of the duplicated layer to Multiply and adjust the opacity to around 30%.
STEP 3: Create a new layer.
STEP 4: Fill the layer with black color using the Paint Bucket tool.
STEP 5: Go to Filter, find Noise, and Add Noise.
STEP 6: Set the blend mode of this layer to Overlay and reduce its opacity to around 15%.
STEP 7: To blend the noise better, apply a 1-pixel Gaussian Blur to each layer.
STEP 8: If you feel a color or hue is lost, add a Hue and Saturation adjustment layer to tweak the colors.
STEP 9: For more blending without darkening or lightening, add a Contrast adjustment layer and reduce the contrast.
Conclusion
And there you have it! A grainy gradient background that can be used in various designs. This effect is versatile and can be tailored to fit different color schemes and design needs.
BONUS FOR YOU: Get the Digital Product Starter Kit and start building your own online business today.
Here Are Some of My Favorite Tools For Print-on-demand
As a graphic designer and POD seller, I’ve had the opportunity to discover different helpful products and tools that can be time-saving and make the process of creating your designs a bit smoother.
DESIGNS: Kittl (best for t-shirt designs), Vexels (for professional designs), Placeit (for unique product mockups)
GRAPHICS: Creative Fabrica (cheapest marketplace), Envato Elements (more variety)
SELLING DESIGNS: Creative Fabrica (for advanced graphic designers)
ETSY:
- Research – Alura (best), ProfitTree ( beginners)
- Fulfillment – Printul (beginners), or Printify (advanced).
Disclosure: Some of the links above may contain affiliate partnerships, meaning, at no additional cost to you, NechEmpire may earn a commission if you click through to make a purchase.
- How to Highlight an Image with a Glowing Neon Frame in Canva - December 13, 2025
- How to Curve & Wrap Text Around a Circle in Canva (Step-by-Step Tutorial) - December 13, 2025
- How To Remove Background In Canva Mobile App - September 4, 2025

